Building Your Menu: Sections, Items & Prices
Build your DineKit menu: create sections, add items, set multiple prices, add images, badges and dietary tags, and reorder by drag and drop.
Your menu is the heart of what DineKit does. Before you can display your menu on your site, you need to build it up from its component parts. This guide walks you through the structure of a DineKit menu and shows you, step by step, how to create sections, add items, set one or more prices, and finish each item off with images, badges and dietary tags. If you have not set up the plugin yet, start with getting started and then come back here.
How a DineKit menu is structured
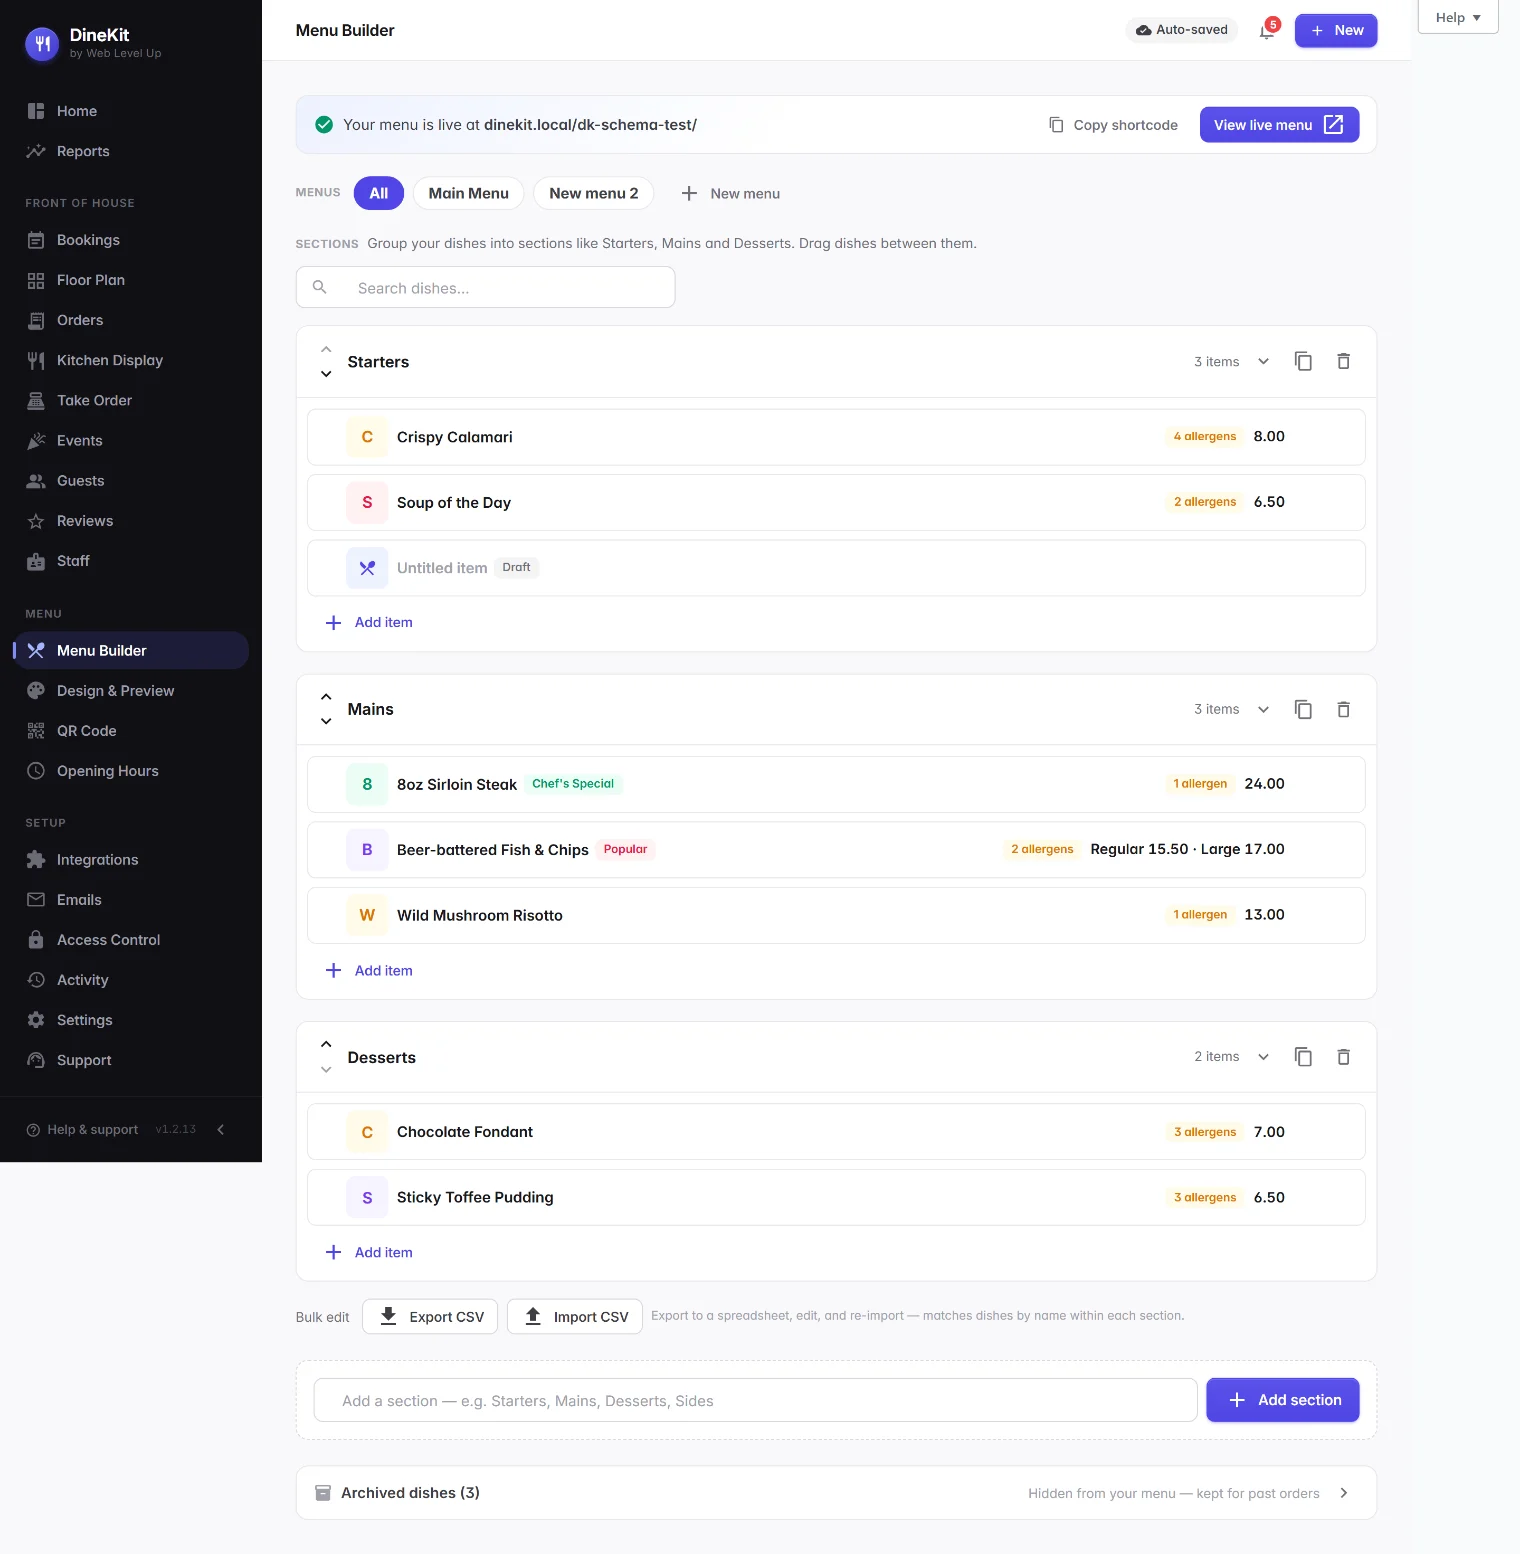
A DineKit menu is built from three simple layers, working from the outside in:
- The menu is the whole collection, for example your food menu or your drinks list.
- Sections group related items together, such as Starters, Mains and Desserts.
- Items are the individual dishes or drinks that sit inside each section, each with its own name, description and price.
Keeping this hierarchy in mind makes the rest of the process straightforward: you create the containers first (the menu and its sections), then fill them with items.
Creating sections
Sections are the headings that break your menu into digestible groups. To create one:
- Open your menu in the DineKit editor.
- Select Add Section.
- Give the section a clear name, such as Starters or Small Plates.
- Save the section. It now appears as an empty container, ready for items.
Add as many sections as your menu needs. A short, well-labelled set of sections helps diners find what they want quickly, so avoid splitting things too finely.
Adding a menu item
With at least one section in place, you can start adding items:
- Inside the section you want to populate, select Add Item.
- Enter the item’s name in the title field, for example Garlic Bread.
- Write a short description, such as Toasted sourdough with roasted garlic butter and parsley.
- Enter a price in the price field.
- Save the item. It now appears within its section.
Keep descriptions concise and appetising. One tempting sentence usually works better than a long paragraph.
Adding multiple prices to one item
Some items are sold in more than one size or format. DineKit’s price repeater lets you attach several prices to a single item, so you do not need to duplicate the dish — a classic example is Regular or Large, or a wine sold by the glass or the bottle.
- Open the item you want to edit.
- In the price area, select Add Price to add a second price row.
- Give the first price a label such as Regular and set its amount.
- Give the second price a label such as Large and set its amount.
- Repeat for any further variations, then save.
Both prices then display neatly against the single item, keeping your menu compact and easy to read.
Adding an image
A good photo can make a dish irresistible. Open the item, find the image field, upload a new photo or choose one from your media library, and save. Use consistent, well-lit images at a similar angle and crop for a tidy, professional look.
Adding badges like Popular or Chef’s Special
Badges are small labels that draw the eye to particular items. DineKit includes options such as Popular and Chef’s Special. To apply one, open the item, choose the badge from the badge field, and save. Use badges sparingly: if everything is highlighted, nothing stands out.
Adding dietary tags
Dietary tags help diners quickly spot items that suit their needs, such as vegetarian, vegan or gluten-free. Open the item, select every tag that applies in the dietary tags field, and save. Allergens are handled separately because they carry legal and safety weight of their own — see our guide on adding allergens.
Reordering sections and items
The order in which things appear matters. DineKit lets you rearrange both sections and items by drag-and-drop: hover over the section or item, click and hold the drag handle, drag it to its new position and release. The new order saves automatically and shows on your live menu. Use this to put your most popular sections near the top.
Keeping your menu tidy
- Review prices regularly so what diners see matches the till.
- Remove items that are no longer available rather than disappointing customers.
- Keep descriptions consistent in length and tone.
- Double-check dietary tags and allergens whenever a recipe changes.
Once your menu is built the way you like it, the final step is to display your menu on your website.